The radiator hoses took a bit of research and trial. I found Summit racing's website handy for these. You can choose hose diameter and angles and lengths pretty easily. I ordered up some random shapes and took to cutting them to fit. They were all reasonably priced and shipping is always quick. Mostly I just needed some 90 degree bends with some length. The lower water inlet on the engine is on the drivers side of the engine block and the corresponding radiator port is on the passenger side of the radiator. I had to get creative with routing and hoses and space. The upper engine outlet/thermostat was a bigger problem. The original Miata outlet pointed sideways directly towards the passenger fender and the corresponding port on the radiator was centered. I ended up finding a Mazda Protege (same basic engine as Miata) thermostat housing/water neck that is oriented straight up, so a simple 90 degree hose with a slight jog fit perfectly.
After that, it was time to finalize the electrical in the interior and begin final assembling the body. I added two small 4-way fuse blocks under the dash to power up the body electrical. The original TR3A has only 2 fuses for everything! Me, I like a little more protection. I added a horn circuit, wipers, head lights, and signals. There is room to add on in the future too.
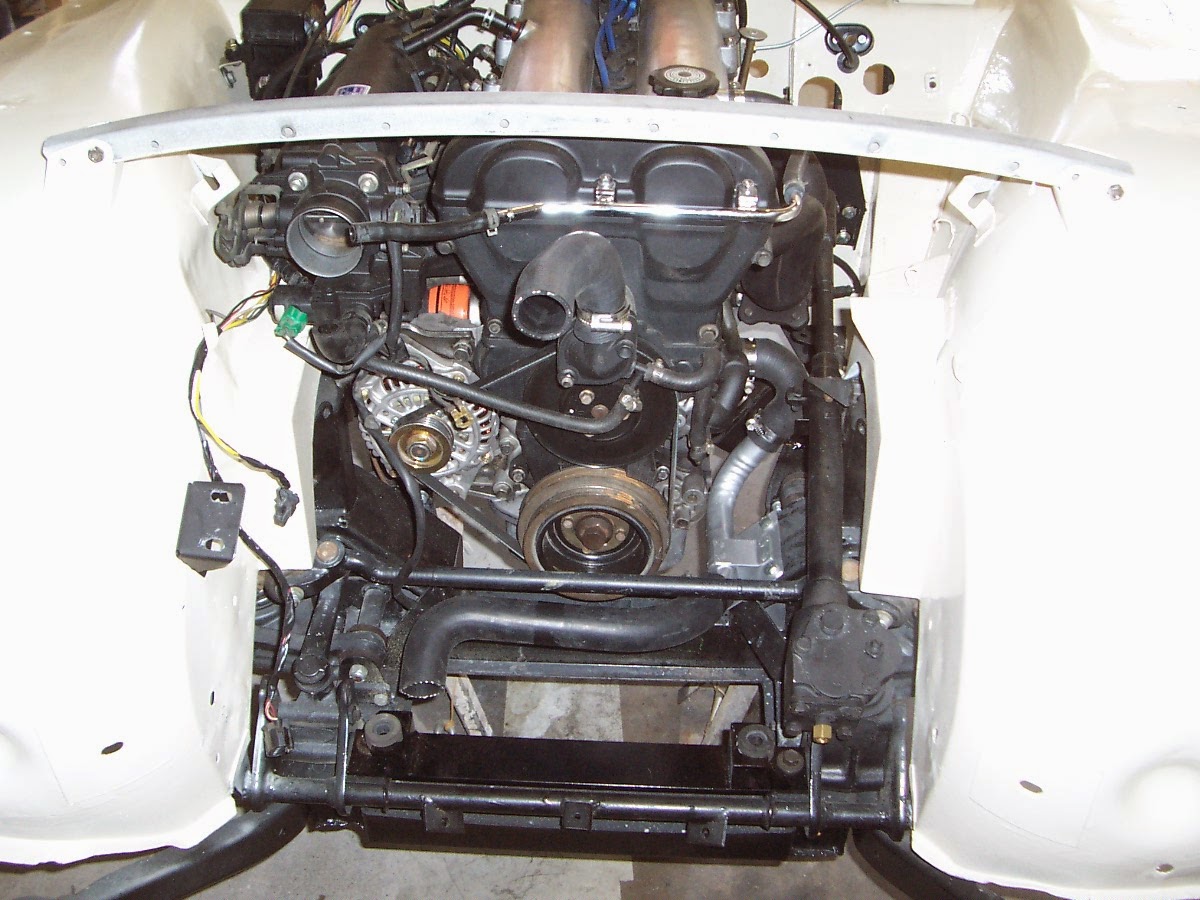
Final radiator hose strategy. The silver pipe portion of the lower radiator hose is a stock Miata piece with it's bracket cut, and re-welded in a slightly different orientation for a custom and clean fit. I took pictures of the labels on all pieces of hose for reference should I ever need to replace them.
Radiator in, Air intake installed. Note the air intake projects in front of the radiator so as to pick up cool incoming air, not hot engine air. I'm not sure how well this set-up is working though as it eliminated a large portion of the original Mazda design air duct with resonance chamber...
Look how well the upper radiator hose fits. Like it was made for it! Also note the heat shield on the coolant overflow bottle due to it's proximity to the exhaust header.
A close up of the relocation of the shifter hole. This also created problems when the transmission tunnel carpet went in as it had a pre-cut and edged hole for the stock shifter that I had to deal with and try to make look right.
The header is wrapped with, um, header wrap. This stuff does an excellent job of mitigating under hood heat.
The apron is wired up separately with one quick-disconnect electrical connector and two dedicated grounds. Notice the headlight relays attached. Nice bright lights with very low current running through the switches equates to longer switch life and reduced melting down. Also note the top radiator support attached to the apron cross beam.
Front-end bolted on for good. The fender beading is in, so I'm not messing with it anymore! (If I can avoid it).