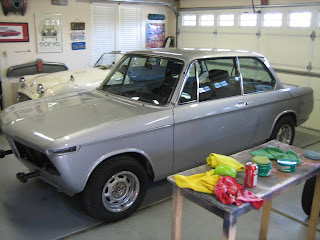
Little 2002, masked under awnings in the side yard wearing a fresh sealer primer coat
Gallon of Polaris base color, custom made by my local automotive paint supplier
Carefully spraying on the base so as to achieve uniformity, avoid any mottled panels or "tiger stripes"
When the base flashed off it had a low satin sheen and it looked almost good enough as-is. I was very pleased with the progress.
During my third pass with the clear is when I noticed the base-coat problem, so I immediately stopped spraying.
You can see the shine brought by the clear, and if not for the cracking, this would have been a fine home-job paint project.
But, this is the result in a few places. 95% of the car looked fine, but a few spots on the trunk, hood, tail panel and "C" pillar had this terrible reaction. It still makes me a little sick to my stomach to look at this.
I have no photos of what took place next- weeks of pain-staking, miserable careful re sanding of the entire body to remove all the failed clear and blend everything back together. Then I took the car to my local paint shop and paid up to have them shoot the car for me.
When I got the car back I masked off the edges and wet sanded with 2000 grit, followed by 3000 grit to really make it smooth, but dull
I spent a day buffing the shine back up.
I spent the next day putting these parts back on.
Some of the trim was looking very very faded by comparison to the new paint, so I polished and cleaned it up. This stuff made the lower moldings look great
Not a huge fan of the brand, but this stuff made the faded bumper bellows look good again (UPDATE: When refueling, I spilled a lil gas on the r/r bellows and it smears this stuff right off into a gooey black greasy mess that invariably ends up getting wiped onto the cars body.)
A little polish and 0000 steel wool cleaned up the marker chrome
the fine sanding and high-speed buffer turned the once bashed and faded drivers door into a mirror!
Coming together. In this photo I haven't yet installed new window rubbers or upper belt line trim, but they went on shortly after. I later discovered that my HVLP gun had a clogged passage near the tip. Had I properly cleaned it, this likely never would have happened. This was a hard lesson.
Final iteration wearing all trim and in daily-driver shape
At the rear I removed the original license plate lights and added tiny LEDs to clean up the lines a bit.


